
Blog
6.0 x Loupes: A Complete Guide to High-Power Magnification


6.0 x loupes are specialized optical devices designed for detailed dental, medical, and surgical procedures. They make the treatment area appear six times larger than it looks through normal vision.
This level of magnification helps clinicians inspect small structures that may be difficult to see with lower-power loupes. These details can include tiny fractures, narrow root canals, delicate blood vessels, fine restoration margins, and small implant components.
However, greater magnification also creates a smaller viewing area and a more sensitive focusing range. Clinicians therefore need accurate measurements, stable posture, proper lighting, and enough time to become comfortable with the system.
What Are 6.0 x Loupes?
The term 6.0 x magnification means that the viewed object appears about six times larger than it would to the naked eye.
Most general dental loupes offer magnification between 2.5 x and 3.5 x. These lower powers provide a wider field of view and are easier to use during routine procedures.
By comparison, 6.0 x loupes provide a much closer view of the treatment area. They are commonly selected for work that requires greater visual detail and more controlled instrument movement.
This makes them especially useful in endodontics, implant dentistry, restorative treatment, microsurgery, and fine tissue procedures.
They are usually better suited to experienced clinicians because the viewing area is narrow and small head movements can move the target out of focus.
How Do 6.0 x Loupes Work?
Most high-power loupes use a Keplerian or prismatic optical system.
This design is more complex than the Galilean system found in many lower-powered loupes. Galilean optics use a simpler lens arrangement and are usually lighter and more compact.
However, Galilean systems have limits when stronger magnification is required.
Keplerian loupes use several lenses and internal prisms. These components redirect and correct the image while keeping the telescopes at a practical length.
A well-made prismatic system can deliver strong magnification, sharp central vision, and good edge clarity. It can also reduce the blurred or distorted appearance that may occur around the edges of weaker optical systems.
The final image quality depends on the telescope design, lens coatings, prism alignment, frame stability, and overall manufacturing quality.
Why Do Clinicians Choose 6.0 x Magnification?
The main reason for choosing 6.0 x magnification loupes is improved visual detail.
Clinicians can use them to inspect small areas that may be difficult to evaluate through normal vision. A larger image may help with identifying fine cracks, locating narrow openings, checking restoration edges, and managing delicate tissue.
High magnification can also support more controlled instrument placement. When the operator can clearly see the treatment area, small movements may become easier to guide.
However, magnification does not replace training or experience. It only provides a closer view.
The clinician must still understand the procedure, use the correct instruments, and maintain steady hand control.
6.0 x Loupes for Endodontics
Endodontics is one of the main areas where high-power magnification is useful.
Root canal systems can contain narrow entrances, hidden branches, calcified sections, and unusual internal shapes. These structures may be hard to see with normal vision or low magnification.
6.0 x loupes can help clinicians examine the access cavity more closely. They may support the search for additional canals and make small changes in tooth structure easier to detect.
They can also help during retreatment procedures. Old filling material, posts, restorations, and damaged tooth structure may create difficult working conditions.
A dental operating microscope can provide even greater magnification. However, loupes are more portable and allow the clinician to move between different positions more easily.
This makes 6.0 x magnification a useful middle option for specialists who want strong detail without depending on a fixed microscope for every procedure.
6.0 x Loupes for Implant Dentistry
In implant dentistry, high magnification can support soft tissue handling, suturing, component placement, and close inspection of the surgical site.
Small changes in tissue position may be easier to see when the area is enlarged. This can help the clinician make more controlled movements during delicate stages of treatment.
Magnification may also help when examining implant components, connection points, and surrounding tissue.
However, the narrow field of view can become restrictive during procedures that require frequent movement across a larger area.
For this reason, some implant clinicians use different magnification levels depending on the stage of treatment.
6.0 x Loupes for Restorative Dentistry
Restorative dentists may use 6.0 x loupes to inspect crown margins, composite edges, finishing lines, and surface defects.
High magnification can reveal excess bonding material, small gaps, rough areas, and fine irregularities that may not be obvious through normal vision.
It can also help during detailed finishing and polishing work.
The main limitation is that the operator can only see a small section of the mouth at one time. This may slow down procedures that require repeated movement between several teeth.
The best magnification therefore depends on the type of restorative work being performed.
Can 6.0 x Loupes Improve Posture?
Correctly fitted loupes can help clinicians maintain a fixed working distance.
Without magnification, a clinician may lean closer to the patient whenever more detail is needed. This can place strain on the neck, shoulders, and lower back.
A properly measured loupe system allows the target to appear clear while the user remains in a more upright position.
The declination angle is also important. It determines how far the eyes look downward through the telescopes.
If the angle is too shallow, the user may still bend the neck excessively. If it is too steep, the viewing position may feel unnatural.
6.0 x loupes do not automatically solve posture problems. Poor measurements, heavy optics, weak frames, and incorrect chair height can create new discomfort.
The loupes, clinician chair, patient position, lighting, and instrument setup must work together.
Understanding the Field of View
The field of view is the width of the area visible through the telescopes.
As magnification increases, the field of view usually becomes smaller. This means 6.0 x loupes show more detail but less surrounding space than lower-powered models.
A typical field may cover one tooth or a small treatment area. The exact width depends on the optical design and working distance.
A narrow field can be helpful when the clinician needs to concentrate on one canal, margin, vessel, or surgical structure.
However, it can become difficult when the user needs to move between several areas quickly.
Users should test the field of view in a realistic working position before choosing a model.
Understanding the Depth of Field
The depth of field is the range in which the image remains acceptably sharp.
A deeper range allows the clinician to move slightly closer or farther away without losing focus.
At 6.0 x magnification, the focusing range is usually more sensitive. Small changes in head position or patient height may cause the image to blur.
This is why accurate working-distance measurements are essential.
A working distance of around 420 millimeters may suit one clinician, but it may not suit another. Height, arm length, posture, chair position, and treatment style all affect the correct measurement.
The loupes should be fitted around the user’s natural posture. The user should not change posture simply to match a standard working distance.
Why Is an LED Headlight Important?
High magnification reduces the amount of available light reaching the eyes.
Shadows also become more noticeable because the clinician is studying a small area in detail.
For this reason, 6.0 x loupes are commonly paired with a coaxial LED headlight.
A coaxial light follows nearly the same path as the user’s vision. It directs light into the exact area visible through the telescopes.
This helps reduce shadows caused by the head, hands, or instruments.
A suitable headlight should offer adjustable brightness, a smooth beam, reliable battery life, and balanced weight.
Very bright light is not always better. Enamel, wet tissue, and metal can reflect light and create glare.
Adjustable brightness allows the clinician to select a comfortable level for each procedure.
Through-the-Lens 6.0 x Loupes
Through-the-lens loupes, also known as TTL loupes, have the telescopes fitted directly into the carrier lenses.
They are normally customized according to the user’s pupillary distance, working distance, eye position, and declination angle.
TTL loupes often provide a stable viewing position and a clean, compact design.
They may also feel lighter because they do not require a large external hinge.
The main disadvantage is limited adjustment. Once the telescopes are fixed into the lenses, their position cannot easily be changed.
Accurate measurements are therefore essential. Poor alignment may cause eye strain, double vision, neck discomfort, or difficulty finding the treatment area.
Flip-Up 6.0 x Loupes
Flip-up loupes attach the telescopes to an adjustable hinge in front of the carrier lenses.
The clinician can raise the optics when speaking with a patient, checking equipment, or viewing the wider room.
The telescopes can then be lowered when magnification is needed.
Flip-up systems often provide more control over the viewing angle and interpupillary distance.
This flexibility can be useful if the system requires adjustment after purchase.
However, the hinge may add extra weight to the front of the frame. It can also move out of alignment if it becomes loose or is handled roughly.
Some users prefer the flexibility of flip-up models, while others prefer the fixed stability of TTL loupes.
Ergonomic and Deflection Prism Loupes
Ergonomic loupes, also called deflection prism loupes, redirect the visual path downward.
This allows the clinician to keep the head more upright while viewing a treatment area below eye level.
The design may help reduce prolonged neck bending and support a more neutral working posture.
These systems are becoming popular among dentists and surgeons who experience neck or back strain.
However, deflection loupes require an adjustment period.
The eyes look forward while the magnified image comes from below. The user must learn how to position the patient and instruments without repeatedly bending the head.
Accurate measurements are especially important because the wrong angle can make the treatment field difficult to locate.
Main Challenges of Using 6.0 x Loupes
The narrow field of view is one of the biggest challenges.
The clinician can see excellent detail inside the magnified area but may have less awareness of nearby objects.
The sensitive focusing range can also make movement difficult. Small changes in posture may cause the image to blur or disappear.
Weight is another concern. Prismatic telescopes contain more optical components than basic Galilean loupes.
A heavy system may place pressure on the nose, ears, or forehead during long procedures.
Eye fatigue may occur if the telescopes are incorrectly aligned. Poor lighting and an unsuitable working distance can also increase discomfort.
New users should increase wearing time slowly rather than using 6.0 x loupes for a full working day immediately.
How to Choose the Right 6.0 x Loupes
The correct system should match the clinician’s natural posture and regular clinical tasks.
Working distance should be measured while the user sits in a comfortable position.
The field of view should also be tested on a treatment area similar to the user’s normal work.
A system suitable for one-tooth endodontic procedures may feel too restrictive for general dentistry.
Buyers should also consider image clarity, telescope weight, frame stability, prescription support, headlight compatibility, warranty coverage, repair services, and adjustment options.
A trial or return period can be valuable.
High-power loupes are personal devices, and technical specifications alone cannot show whether a system will feel comfortable during daily use.
Are 6.0 x Loupes Worth Using?
6.0 x loupes can be valuable for clinicians who regularly perform precision-based procedures.
They provide a level of visual detail that lower-powered systems may not offer.
This can support close inspection, careful instrument movement, and detailed clinical work.
However, higher magnification is not always better.
A general dentist who frequently moves across the full mouth may prefer a wider field at 3.0 x or 4.0 x.
An endodontist working inside a small access cavity may benefit more from 6.0 x.
The best option is the lowest magnification that clearly shows the required detail while supporting comfortable posture, stable focus, and efficient movement.
FAQs
What are 6.0 x loupes used for?
6.0 x loupes are used for detailed dental, surgical, medical, and veterinary procedures. Common uses include endodontics, implant treatment, microsurgery, restorative margin inspection, suturing, and fine tissue management.
Are 6.0 x loupes suitable for beginners?
They can be difficult for beginners because they provide a smaller field of view and a more sensitive focusing range. Many clinicians begin with lower magnification before moving to 6.0 x.
Do 6.0 x loupes require an LED light?
An LED headlight is strongly recommended. High magnification needs strong direct lighting, and a coaxial light helps brighten the same area visible through the telescopes.
What is the best working distance for 6.0 x loupes?
There is no single best working distance. It should be measured according to the clinician’s height, posture, arm length, chair position, patient position, and treatment style.
Are TTL or flip-up 6.0 x loupes better?
TTL loupes offer fixed custom alignment and a compact design. Flip-up loupes provide more adjustment and can be moved away from the eyes. The better option depends on comfort, weight, posture, and workflow.

Tsunaihaiya is a distinctive Japanese jewelry brand known for handcrafted silver pieces, bold surface textures, and meaningful cultural influences. Its collections combine Native American jewelry techniques with the careful metalworking traditions associated with Japanese craft.
Founded in 2012 by Japanese designer Yusuke Kuwano and San Carlos Apache sculptor Craig Dan Goseyun, the brand offers rings, bangles, bead bracelets, necklaces, and leather accessories. Each design has an artistic character that separates it from ordinary mass-produced jewelry.
What Is Tsunaihaiya?
Tsunaihaiya is an independent Japanese jewelry brand built around cultural exchange and traditional craftsmanship. Its identity developed through the creative partnership between Kuwano and Goseyun.
The brand does not simply copy classic Southwestern jewelry. Instead, it combines inherited Native American methods with Japanese ideas about shape, texture, balance, and beauty.
Many pieces have a raw, natural surface. Hammer marks, uneven lines, darkened silver, and polished areas are used to create depth. These details make every ring or bracelet feel more like a small work of art than a basic fashion accessory.
What Does the Name Tsunaihaiya Mean?
The name Tsunai Haiya is reported to come from the language of the San Carlos Apache people. It means “the rising sun” or “the land where the sun rises,” referring to Japan.
This meaning supports the brand’s central idea. Japan is represented through the image of the rising sun, while the Apache connection recognizes the cultural background that influenced its jewelry-making approach.
The name therefore reflects more than a geographic location. It represents a creative bridge between two artistic worlds.
Who Founded Tsunaihaiya?
Tsunaihaiya was established in 2012 by Yusuke Kuwano and Craig Dan Goseyun.
Kuwano is a Japanese artist and jewelry designer who spent time studying Native American and Southwestern art in the United States. Goseyun is a sculptor connected to the San Carlos Apache tribe.
Their partnership helped form a brand that respects traditional skills while developing a modern Japanese identity. The result is jewelry that feels historic and contemporary at the same time.
Retailers now commonly identify Kuwano as the main designer associated with the label. His work continues to explore how traditional ornament can fit modern clothing and everyday life.
The Fusion of Japanese and Native American Craft
The main strength of Tsunaihaiya jewelry is its artistic fusion. Native American jewelry has a long connection with hand-worked silver, natural stones, stamped patterns, and meaningful decorative forms.
Japanese metal craft also values patience, controlled detail, natural surfaces, and the beauty of small imperfections. Tsunaihaiya brings these approaches together without making the designs feel crowded.
Instead of relying only on obvious tribal symbols, the brand often focuses on texture and form. A wide silver bangle may have a deeply hammered surface, while a ring may use a slightly uneven shape that reflects light from different angles.
This restrained approach makes the jewelry suitable for people who enjoy cultural craft but prefer a modern look.
Signature Tsunaihaiya Rings and Bangles
The brand is especially recognized for sterling silver rings and wide bangles.
One notable style is the Texturerized Tsuime collection. These pieces use repeated hammering to produce a marked, reflective surface. The technique gives silver a rugged appearance while maintaining a polished finish.
Tsunaihaiya rings range from thin stacking designs to wide statement pieces. Some have smooth edges and rough centers. Others use irregular curves that make the metal appear naturally shaped.
Its bangles are heavier and more visible. Wide cuffs can become the main feature of an outfit, while slimmer bracelets work well with watches or other jewelry. Product listings describe several designs as sterling silver or Silver 925.
Natural Stone Bead Bracelets
Tsunaihaiya also produces colorful natural stone bracelets. These designs offer a softer alternative to the brand’s heavier silver pieces.
The Colorfield Beads collection uses stones in mixed shades and sizes. Available designs have featured materials such as turquoise, lapis lazuli, and moonstone, often combined with Silver 925 details.
The uneven color combinations give the bracelets an organic appearance. Blue, white, green, black, and earthy tones can be worn alone or layered with silver bangles.
These bead bracelets are generally unisex. Their simple construction makes them easy to pair with casual clothing, denim, workwear, or relaxed summer outfits.
Premium Silver and Baker Bridle Leather
Material quality plays a major role in the brand’s appeal. Many Tsunaihaiya pieces use sterling silver, which contains at least 92.5 percent silver.
The brand also uses premium leather in selected bracelets, wallets, and keyrings. Some accessories combine sterling silver with bridle leather produced by the English tannery J. & F.J. Baker & Co.
Baker bridle leather is valued for its durability, firm structure, and ability to develop character over time. Tsunaihaiya uses it to create leather bracelets with a refined but rugged appearance.
This combination of silver and leather makes the accessories suitable for buyers who appreciate materials that age naturally.
Why Is Tsunaihaiya Jewelry Special?
Tsunaihaiya stands out because its pieces show visible evidence of the maker’s work. The hammered marks, varied surfaces, and irregular forms are intentional design choices.
Each piece communicates a sense of patience and individuality. It does not look as if it came directly from a large factory line.
The brand also avoids placing itself within only one style category. Its jewelry can appeal to fans of Japanese fashion, Native American craft, luxury streetwear, heritage clothing, or handmade accessories.
Men and women can wear most designs, making the collection especially attractive to shoppers searching for unisex designer jewelry.
How to Style Tsunaihaiya Jewelry?
Tsunaihaiya jewelry works best when the piece remains visible. A wide silver cuff can be worn with a plain black shirt, denim jacket, or rolled sleeve.
Textured rings can be combined with simple silver bands, but wearing one large ring alone can create a cleaner look. Natural stone bracelets pair well with linen, denim, leather, and neutral clothing.
Leather and silver bracelets suit workwear-inspired outfits, while polished silver pieces can add character to formal clothing.
Because the designs already contain strong textures, it is usually better to avoid wearing too many large accessories at once.
How to Care for Tsunaihaiya Silver?
Sterling silver naturally becomes darker when exposed to air, moisture, and skin oils. This process is called tarnishing and does not normally mean that the jewelry is damaged.
Use a soft silver polishing cloth to restore brightness. Avoid harsh household chemicals, chlorine, and rough cleaning brushes.
Natural stones should be cleaned gently with a dry or slightly damp cloth. Leather accessories should remain away from heavy rain and direct heat. Proper care will help the silver, stones, and leather develop an attractive appearance over time.
Bottom Line
Tsunaihaiya is more than a fashionable jewelry name. It represents a thoughtful meeting between Japanese design and Native American craft traditions.
Its textured silver rings, wide bangles, colorful stone bracelets, and leather accessories offer something different from standard luxury jewelry. Strong materials and visible handwork give the collection a timeless character.
For buyers who value cultural inspiration, natural materials, and distinctive craftsmanship, Tsunaihaiya offers jewelry that can be worn daily while still feeling personal and artistic.
FAQs
What is Tsunaihaiya?
Tsunaihaiya is a high-end Japanese jewelry brand founded in 2012. It is known for combining Japanese metalworking with Native American-inspired silver craftsmanship.
Who founded Tsunaihaiya?
The brand was founded by Japanese designer Yusuke Kuwano and Craig Dan Goseyun, an artist connected to the San Carlos Apache tribe.
What does Tsunaihaiya mean?
The name is commonly described as meaning “Land of the Rising Sun” in the Apache language. It refers to Japan and reflects the brand’s cross-cultural identity.
What materials does Tsunaihaiya use?
Tsunaihaiya uses sterling silver, turquoise, lapis lazuli, other natural stones, and premium leather. Some accessories also feature English Baker bridle leather.
What products is Tsunaihaiya known for?
The brand is best known for hand-hammered silver bangles, detailed rings, natural stone bead bracelets, leather accessories, and other unisex jewelry designs.

For many people with Polish ancestry, applying for citizenship by descent is more than an administrative process. It can be a way to reconnect with family history, preserve a cultural legacy, or make practical plans for life, work, study, or travel in Europe.
One of the most common concerns is whether limited Polish language skills could prevent an applicant from moving forward. In most cases, the answer is reassuring: speaking Polish is generally not a legal requirement for confirming Polish citizenship by descent.
That said, language can still affect how easily an applicant understands documents, communicates with institutions, and manages the practical side of the process. Knowing the distinction between a citizenship confirmation procedure and other immigration routes is essential before collecting records or submitting an application.
Polish citizenship by descent: the central principle
Polish citizenship by descent is based on the principle of jus sanguinis, meaning “right of blood.” In simple terms, a person may be regarded as Polish from birth if at least one parent held Polish citizenship at the time of the person’s birth. The right may also pass through grandparents or more distant ancestors, depending on the family’s citizenship history and the relevant laws in force at different points in time.
Importantly, the process is not usually about acquiring citizenship because of language skills, residence, or cultural integration. It is commonly a procedure to confirm citizenship that may already have been inherited. The applicant must demonstrate a legal chain of citizenship from a Polish ancestor to the present day.
For that reason, authorities normally focus on documentary evidence rather than language proficiency. Relevant records may include:
- Polish birth, marriage, or death certificates;
- old Polish passports, identity cards, military records, or household registration documents;
- foreign birth and marriage certificates proving family relationships across generations;
- naturalization records from another country;
- immigration documents showing when an ancestor left Poland;
- evidence concerning whether and when an ancestor may have lost Polish citizenship under historical laws.
An applicant may be fluent in Polish, know only a few family expressions, or have no knowledge of the language at all. None of these circumstances, by itself, determines whether citizenship was inherited.
When Polish language skills are not required
In a standard application for confirmation of Polish citizenship by descent, applicants are not ordinarily required to take a language examination, attend an interview in Polish, or prove cultural knowledge. The legal question is whether the person’s parent, grandparent, or earlier ancestor was a Polish citizen and whether citizenship was successfully transmitted through each generation.
Consider the example of an applicant born in Canada whose grandmother was born in Poland in the 1920s. The applicant may have grown up in an English-speaking household and never learned Polish. If the grandmother remained a Polish citizen until the applicant’s parent was born, and the citizenship chain is supported by appropriate records, lack of Polish fluency should not undermine the case.
Similarly, an Australian applicant may have a Polish-born grandfather but possess only translated family documents and limited knowledge of Poland’s history. The case will depend on the grandfather’s legal status, dates of emigration, military service where relevant, naturalization history, and the documentary connection between the generations—not on the applicant’s language ability.
Why language can still matter in practice
Although Polish is not generally a substantive eligibility requirement, the application process can involve Polish-language paperwork. Applications submitted to Polish authorities are typically prepared in Polish, and foreign civil-status documents often need to be translated by an authorised or sworn translator. Depending on the country of issue and the intended use of the document, an apostille or legalisation may also be necessary.
This can feel intimidating, especially for applicants who are approaching their family’s history after many years of distance. It is entirely reasonable to need help interpreting archival records, understanding historical place names, or identifying inconsistencies in documents. Many older records were handwritten, used former territorial designations, or recorded names in Polish, Russian, German, Yiddish, Latin, or another language used in the region at the time.
Professional guidance may be useful when a family history involves several jurisdictions, missing certificates, historical naturalization issues, or ancestors who moved frequently. For example, applicants researching their route through Five to Europe may find it helpful to begin by organising the known facts: full names, maiden names, dates and places of birth, emigration dates, marriages, and any available Polish documents.
Even when external assistance is involved, applicants benefit from maintaining a clear personal file. A simple timeline can prevent confusion and make it easier to spot missing links in the evidence.
Useful organisational steps for non-Polish speakers
- Create a family timeline: list each generation from the Polish ancestor to the applicant, including births, marriages, name changes, migrations, and deaths.
- Keep original spelling variations: surnames may appear differently after migration, marriage, translation, or clerical transcription.
- Separate originals from translations: label every document clearly and retain digital copies in a secure folder.
- Check document requirements early: apostilles, certified copies, and sworn translations can take time and may involve additional costs.
- Do not rely only on family stories: oral history is valuable for research, but official records are normally needed to support a legal application.
Situations where Polish language requirements may apply
Confusion often arises because Poland has several different pathways related to citizenship and residence. While citizenship by descent generally does not require a language test, other procedures may involve language proficiency or integration requirements.
For instance, a person applying for Polish citizenship through naturalisation, after long-term residence in Poland, may need to show Polish language ability at a specified level. Requirements can vary depending on the legal basis of the application, including marriage to a Polish citizen, permanent residence, refugee status, or other circumstances.
Polish language ability may also be relevant for those seeking to study, work, settle, or participate more fully in daily life in Poland. It can make interactions with medical providers, schools, employers, landlords, banks, and public offices less stressful. However, these practical benefits should not be confused with the legal requirements for citizenship confirmation by descent.
It is therefore important to identify the exact procedure before assuming that a Polish language certificate is needed. An applicant who is eligible by descent should not automatically be assessed according to rules designed for foreign nationals seeking citizenship through residence.
Legal and historical issues often matter more than language
Cases involving Polish citizenship by descent can be legally complex because Polish citizenship laws have changed over time. A family’s eligibility may be affected by such factors as an ancestor’s date of birth, place of residence, acquisition of another nationality, military service in a foreign country, marriage, or gender-based rules that applied under earlier legislation.
For example, an ancestor who emigrated before the Second World War may have been subject to different citizenship rules than someone who left Poland in the 1960s. A woman’s citizenship status may also require careful review where historical laws treated married women differently from men. These are not matters that can be resolved through language fluency or cultural connection; they require accurate documents and careful legal interpretation.
It is also worth remembering that historical borders in Central and Eastern Europe changed repeatedly. A birthplace now located in Ukraine, Lithuania, Belarus, or another country may have been within Poland at the time of an ancestor’s birth. Conversely, a relative described in family records as “Polish” may not necessarily have held Polish citizenship in the legal sense. Research should distinguish ethnicity, language, religion, place of origin, and formal nationality.
The emotional side of tracing Polish roots
Citizenship research can bring unexpected emotions. Applicants may discover family experiences involving war, displacement, forced migration, separation, or silence around the past. Others may feel uncertain about claiming a connection to Poland when they do not speak the language or have never visited the country.
These feelings are understandable. Legal eligibility is determined by evidence and statutory rules, while personal belonging is more individual. A person does not need to perform a particular version of Polish identity in order to investigate whether citizenship was inherited. At the same time, learning a few words of Polish, reading about local history, speaking with older relatives, or visiting an ancestral town can be meaningful choices for those who wish to build a deeper connection.
It can be helpful to approach the research at a manageable pace. Archival searches and government processing may take months, and some records may be difficult to obtain. Setting a document budget, keeping expectations realistic, and seeking support from family members can reduce the pressure associated with the process.
Key takeaway
You do not usually need to speak Polish to apply for confirmation of Polish citizenship by descent. The decisive issue is whether you can establish an uninterrupted legal connection to a Polish citizen ancestor through reliable records. Language may be useful for navigating translations, archives, and later life in Poland, but it is not normally the test of whether citizenship was inherited.
Anyone considering an application should take time to identify the correct legal pathway, gather documents methodically, and examine the family timeline with care. Exploring Polish citizenship by descent can be both a legal undertaking and a personal journey, and a well-informed approach can make both aspects easier to navigate.
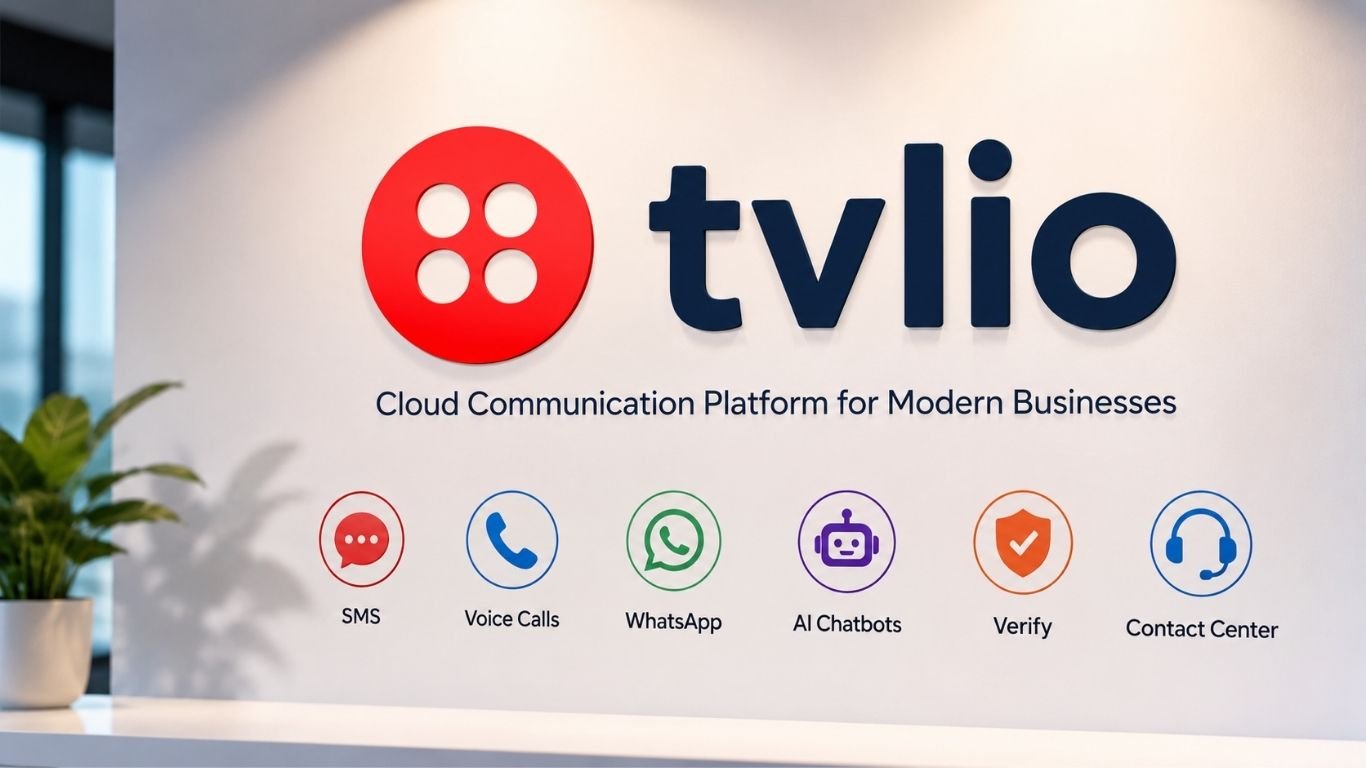
Tvlio is a cloud communication platform built for developers and businesses. It helps companies add messaging, phone calls, customer support, and digital communication tools to websites and mobile apps.
Developers use the Tvlio Official Site to access tools that connect software with communication networks. These tools can support SMS messages, voice calls, WhatsApp chats, account alerts, and AI customer service bots.
A business does not need to build its own phone or messaging network. It can use Tvlio to connect its application with customers through several channels.
This makes the platform useful for online stores, banks, healthcare services, delivery apps, travel firms, and customer support teams.
How Does Tvlio Work?
Tvlio works through tools known as APIs. An API allows two software systems to communicate with each other.
For example, an online shop may want to send a text message after a customer places an order. The shop’s software sends a request to Tvlio. The platform then delivers the message to the customer.
The same process can be used for phone calls, WhatsApp replies, login codes, payment alerts, and appointment reminders.
Developers control when each action happens. They can also choose the content of the message and decide what happens when a user responds.
Tvlio acts as a bridge between the business application and the communication network.
Tvlio SMS Messaging Services
SMS messaging is one of the main services associated with Tvlio.
Businesses can use the platform to send and receive text messages through their applications. These messages may include delivery notices, booking updates, payment alerts, security codes, and special offers.
For example, a delivery app can send a message when a driver is close to the customer’s home. A clinic can remind a patient about an upcoming visit.
Companies may also use SMS for customer support. Customers can send questions by text, while support teams reply through a connected business system.
Automated messages can save time, but businesses should only send useful and approved content. Customers should also have a clear way to stop marketing messages.
Phone Calls Through Tvlio
Tvlio can help developers add phone call features to websites, apps, and business systems.
A company may use these tools to make or receive calls, route customers to different departments, record approved calls, or play automated voice messages.
For example, a bank may call a customer about unusual account activity. A medical center may send an automated reminder before an appointment.
Businesses can also use virtual phone numbers. These numbers help companies manage calls without setting up a traditional office phone system.
Call masking may also protect personal phone numbers. A delivery driver and customer can speak without seeing each other’s private contact details.
These features make Tvlio useful for sales teams, service centers, and online platforms.
Tvlio WhatsApp Messaging
WhatsApp has become an important business communication channel. Tvlio allows developers to connect WhatsApp messaging with their applications.
A company can use WhatsApp to answer customer questions, share order updates, send receipts, confirm bookings, or provide product information.
Businesses may also build automated chatbots that answer common questions. A chatbot can help users check an order, find store hours, or request support.
Some WhatsApp messages may require approved templates. Businesses must also follow platform rules and gain customer permission before sending promotional content.
WhatsApp integration can help companies reach customers through an app they already use each day.
AI Customer Service Bots
Tvlio can support AI customer service bots across messaging and voice channels.
An AI bot can answer simple questions, collect customer details, guide users through basic steps, or send a case to a human support agent.
For example, a customer may ask when an order will arrive. The bot can check the order system and provide an update.
A voice bot may also answer calls and ask why the customer is calling. It can then provide basic help or connect the customer with the correct department.
AI can reduce waiting times and support customers outside normal office hours. However, companies should still provide access to human agents.
AI tools may misunderstand complex questions. Human review is important for complaints, payments, legal matters, and sensitive personal information.
Account Verification and Security
Online businesses need to confirm that users are real. Tvlio can support account verification through text messages, calls, and other digital channels.
A common example is a one-time login code. A user enters a password, and the system sends a second code to their phone.
This process adds another layer of security. It can help protect an account even when someone knows the password.
Businesses may use verification during account creation, password recovery, payment approval, or changes to personal information.
Security tools can also reduce fake accounts and automated abuse. However, companies must protect stored customer data and follow local privacy laws.
Who Can Use Tvlio?
Tvlio can be used by companies of different sizes.
Startups may use it to add communication features without building a large technical system. Growing businesses can use it to manage higher numbers of messages and calls.
Large companies may connect Tvlio with sales software, customer databases, help desk tools, and online payment systems.
Online stores can use it for order updates. Banks can send security notices. Travel companies can share flight or booking changes.
Healthcare services may send appointment reminders. Delivery apps can connect drivers with customers. Schools can share urgent notices with parents.
The platform is especially useful for businesses that want communication tools inside their own software.
Benefits of Using Tvlio
One major benefit of Tvlio is flexibility. Businesses can select the communication services they need.
A company may begin with SMS messages and later add phone calls, WhatsApp, account verification, or AI bots.
Another benefit is automation. Messages and calls can be triggered by events inside an application.
For example, a payment confirmation can be sent as soon as a transaction is complete. A reminder can be delivered before an appointment.
Tvlio can also improve customer service. Users can contact a business through familiar channels instead of visiting a separate support page.
Developers can customize the system to match the company’s needs, brand, and customer journey.
Possible Challenges of Tvlio
Tvlio may require technical knowledge. Developers often need to understand APIs, coding, webhooks, security, and communication rules.
A business without a development team may find some features difficult to set up.
Costs may also grow when the number of messages and calls increases. Prices can depend on the service, country, communication channel, and customer volume.
Companies must also follow messaging laws. These rules may cover customer consent, marketing content, phone number registration, and opt-out requests.
Poor setup can lead to failed messages, unwanted calls, or security problems. Businesses should test every feature before using it with a large number of customers.
Tvlio for Customer Engagement
Customer engagement means building useful and lasting communication with customers.
Tvlio can help businesses contact users at different stages of their journey. A company may send a welcome message after registration, an update after a purchase, and a feedback request after delivery.
These messages can make customers feel informed and supported.
Businesses can also use customer responses to improve service. Common questions may show where users need clearer information.
Communication should remain relevant. Sending too many messages can annoy customers and damage trust.
The best customer engagement system provides useful information at the right time and through the right channel.
Is Tvlio Good for Small Businesses?
Tvlio can be helpful for a small business that needs custom communication tools.
A growing online store may use it for order alerts, customer questions, and delivery updates. A small clinic may use it for appointment reminders.
However, businesses should first consider their technical skills and budget.
A simple ready-made messaging service may be easier for a company with basic needs. Tvlio may be more suitable when a business needs deeper control and custom features.
Small businesses should begin with one clear use case. They can test the service before adding more channels or automation.
Is Tvlio Good for Developers?
Tvlio is mainly designed for developers who want to add communication features to software.
Instead of building direct links with phone and messaging networks, developers can use ready-made tools.
This can reduce development time and make it easier to launch new features.
Developers can create text alerts, phone systems, support bots, verification flows, and WhatsApp services.
They can also connect communication events with databases and business software.
The platform offers strong flexibility, but developers still need to build secure and reliable workflows. Error handling, customer consent, and data protection should be part of every project.
Future of Tvlio and Cloud Communication
Cloud communication continues to grow as more businesses move their services online.
Customers now expect fast answers across text, calls, WhatsApp, and chat. They also expect businesses to remember earlier conversations.
Tvlio can help companies bring these channels together.
AI may also play a larger role. Future customer service bots may handle more natural conversations and complete simple tasks without human help.
Voice systems may become faster and more personal. Messaging tools may also provide smarter replies based on customer needs.
Human support will still remain important. The strongest systems will combine automation with trained customer service agents.
Bottom Line
Tvlio is a cloud communication platform that helps developers connect applications with customers.
It can support SMS messages, phone calls, WhatsApp conversations, account verification, alerts, and AI customer service bots.
Businesses can use these tools to automate communication and provide faster support. Developers can also customize each service to match the needs of an application.
The platform can work well for startups, online stores, support teams, and large companies. However, successful use requires technical planning, security controls, customer consent, and careful cost management.
Tvlio is more than a basic messaging service. It provides the digital tools businesses need to build communication directly into their websites, apps, and customer systems.
FAQs
What is Tvlio used for?
Tvlio is used to add SMS, phone calls, WhatsApp messaging, account verification, notifications, and AI customer support tools to websites and applications.
Is Tvlio a messaging app?
No. Tvlio is a cloud communication platform. Developers use its tools to build messaging and calling features into other applications.
Can Tvlio send SMS messages?
Yes. Businesses can use Tvlio to send order updates, alerts, login codes, reminders, and customer support messages through SMS.
Does Tvlio support WhatsApp?
Yes. Tvlio can connect business applications with WhatsApp for customer service, booking updates, receipts, and automated conversations.
Can Tvlio create AI customer service bots?
Yes. Developers can connect Tvlio communication services with AI systems to build messaging bots, voice assistants, and automated customer support tools.

What Is Tsunaihaiya? A Guide to Its Rings, Bangles, and Bracelets

Do You Need to Speak Polish to Apply for Citizenship by Descent?

What Is Tvlio? A Complete Guide to the Cloud Communication Platform
-

 Technology3 months ago
What Is Nerwey? A Complete Guide To The Online Platform
-

 Celebrity5 months ago
Who Is Joseph Toney Biography? The Untold Story of Shaquille O’Neal’s Father
-

 Biography6 months ago
Who Is Renee Berry? The Untold Story of Halle Berry’s Half Sister
-

 Celebrity5 months ago
Who Is Rodney Tyson? The Untold Story of Mike Tyson’s Brother
-

 Celebrity6 months ago
Who Is Roslyn Jordan? All About Sister of basketball icon Michael Jordan
-

 Biography6 months ago
Who Is Jenna Shue? All About Elisabeth Shue’s Sister and Her Corporate Career
-

 Celebrity4 months ago
Married at Just 16: The Controversial First Marriage of Jerry Lee Lewis and Dorothy Barton
-

 Celebrity5 months ago
Who Is Kazembe Ajamu Coleman? A Complete Biography of Zendaya’s Father